Overview of Security Camera Systems
Security camera systems have become an integral part of both residential and commercial security measures. Understanding these systems involves knowing their basic components, functions, and the various types of cameras available on the market.
At the core, a security camera system generally consists of cameras, recording equipment, and a means to monitor and manage the footage. The primary purpose of a security camera system is to provide real-time surveillance and record events for future review. This is critical for deterring potential intruders, providing evidence in case of incidents, and ensuring the overall safety of a property.
There are various types of security cameras, each suited to different environments and purposes. Some of the most common types include:
- Bullet Cameras: These are typically used for outdoor applications and are characterized by their long, cylindrical shape.
- Dome Cameras: Named for their dome-shaped housing, these are usually installed indoors and offer a wide field of view.
- PTZ Cameras: PTZ stands for Pan, Tilt, and Zoom. These cameras can be remotely controlled to cover large areas and focus on specific objects or events.
- Infrared Cameras: Equipped with infrared LEDs, these cameras can capture clear images in low light or complete darkness.
- Network/IP Cameras: These cameras transmit video over a network, making them suitable for remote viewing and management through the internet.
In addition to the cameras themselves, a security camera system often includes Digital Video Recorders (DVRs) or Network Video Recorders (NVRs) depending on whether the system is analog or IP-based. These recording devices store footage for later review and can be equipped with features such as motion detection and remote access.
Modern security camera systems are also integrated with software platforms that offer various functionalities, including live streaming, video analytics, alert notifications, and integration with other security systems such as alarms and access control.
It is important to consider several factors when choosing a security camera system, such as the specific security needs, the environment in which the cameras will be installed, and any potential legal considerations regarding privacy and data protection.
Overall, the right security camera system can significantly enhance the security posture of any property, providing peace of mind to its occupants and stakeholders.
Planning and Assessment for Installation
Effective planning and assessment are critical components for a successful security camera installation. This phase ensures that the system meets the specific requirements of the property and provides optimal coverage.
2.1 Site Survey
The first step in the planning and assessment phase involves conducting a comprehensive site survey. This process includes evaluating the premises to identify the areas most vulnerable to unauthorized access or potential security breaches.
Key aspects to examine during a site survey include:
- Entry and exit points
- Perimeters (fences, walls, etc.)
- Critical assets (e.g., safes, server rooms)
- Areas with frequent human traffic (e.g., hallways, reception areas)
A detailed site survey helps determine the optimal locations for camera placement, ensuring comprehensive coverage of critical areas.
2.2 Identifying Objectives
Understanding the primary security objectives is essential to tailor the camera system effectively. Objectives may vary widely depending on the property and its use case, such as:
- Deterring criminal activity
- Monitoring employee activities
- Enhancing workplace safety
- Gathering evidence for investigations
Clearly defining these objectives helps in selecting the right type of cameras and coverage areas.
2.3 Assessing Environmental Factors
Environmental factors significantly influence the performance and longevity of security cameras. Important considerations include:
- Lighting conditions: Ensure cameras can handle varying light levels (e.g., day/night cameras, infrared capabilities).
- Weather conditions: For outdoor cameras, consider weatherproofing and temperature tolerance.
- Potential obstructions: Trees, signage, and other obstructions can hinder camera view.
By accounting for these factors, the camera system can be optimized for reliable operation under all conditions.
2.4 Budget and Resources
Understanding the budget and available resources is crucial for planning a feasible installation. Factors to consider include:
- Cost of equipment (cameras, cables, mounts, etc.)
- Installation labor costs
- Ongoing maintenance and potential future upgrades
Balancing costs with requirements ensures that the security system is both effective and sustainable.
2.5 Compliance and Legal Considerations
Adhering to legal and regulatory requirements is essential for any security camera installation. Considerations include:
- Privacy laws that may restrict camera placement (e.g., not intruding on private spaces like restrooms)
- Industry-specific regulations (e.g., HIPAA for healthcare, GDPR for handling personal data)
- Signage requirements to inform individuals that they are being recorded
Ensuring compliance helps avoid legal issues and builds trust with stakeholders.
Selection of Appropriate Cameras and Equipment
When selecting the appropriate cameras and equipment for a security system, there are several key factors to consider. These factors ensure that the system will effectively meet the security needs of the environment it is meant to protect.
Types of Security Cameras
There are various types of security cameras available, each designed for specific applications:
- Dome Cameras: These are generally used for indoor applications and are known for their unobtrusive design. They offer a wide field of view and are often equipped with vandal-resistant features.
- Bullet Cameras: Ideal for outdoor use, these cameras are excellent for long-distance viewing. They typically come with protective casings to withstand the elements.
- PTZ Cameras: Pan-Tilt-Zoom cameras offer the ability to move and zoom in on subjects within their field of view. These are often used in larger areas that require active monitoring.
- Box Cameras: These cameras offer customizable lenses and are generally used in environments where specific zoom and focus are required.
- IP Cameras: Internet Protocol cameras are digital cameras that transmit data over a network, providing high-resolution images and ease of remote access.
Camera Specifications
When choosing cameras, it is important to pay attention to technical specifications such as resolution, frame rate, and low-light performance. Here is a basic comparison of key camera specifications:
| Specification | Description |
|---|---|
| Resolution | The clarity of the captured image, commonly measured in megapixels. Common resolutions include 720p, 1080p, and 4K. |
| Frame Rate | The number of frames captured per second (fps). Higher frame rates result in smoother video. |
| Low-Light Performance | Indicates the camera’s ability to capture clear images in low-light conditions, often enhanced by infrared LEDs. |
| Field of View (FOV) | The area visible through the camera lens, typically measured in degrees. |
Support Equipment
In addition to cameras, several other pieces of equipment are vital for a fully functional security camera system:
- Digital Video Recorders (DVRs) or Network Video Recorders (NVRs): These devices store the video footage captured by the cameras. The choice between DVR and NVR depends on the type of cameras used (analog or IP cameras, respectively).
- Cabling: Coaxial cables are used with analog systems, while Ethernet cables (Cat5e or Cat6) are used with IP cameras.
- Power Supply: Cameras require a stable power source, which can be delivered via traditional power adapters or Power over Ethernet (PoE).
- Mounting Hardware: Brackets, poles, and mounts secure the cameras in position.
- Monitors: Display units that allow for real-time monitoring and review of recorded footage.
Environmental Considerations
Environmental factors, such as weather and lighting conditions, must also be considered:
- Weatherproofing: Outdoor cameras need to have a suitable IP (Ingress Protection) rating to withstand exposure to rain and dust.
- Temperature Range: Cameras should be rated for the temperature extremes of the environment in which they will be used.
- Vandal Resistance: Cameras placed in vulnerable locations should be housed in vandal-resistant enclosures.
Compliance and Standards
Lastly, ensure that the chosen cameras and equipment comply with relevant standards and regulations, such as the ONVIF (Open Network Video Interface Forum) standard for IP cameras, which ensures compatibility between different manufacturers’ products.
Installation Process and Best Practices

The installation process for security cameras can be complex and requires careful attention to detail to ensure that the system functions correctly and provides the expected level of security. This chapter provides a step-by-step guide to the installation process and highlights best practices to ensure optimal performance and longevity of the system.
Step 1: Pre-Installation Preparation
Before beginning the installation, gather all required tools and equipment. Verify that you have all necessary components, including cameras, mounts, cables, power supplies, and any needed accessories like drill bits or screws.
Important Tools:
- Drill and drill bits
- Screwdrivers
- Cable testers
- Wire strippers
- Hammer
- Level
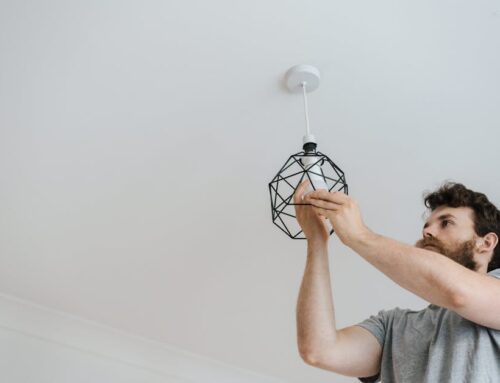
Step 2: Camera Placement
Identify the optimal locations for the cameras based on the initial site assessment. Emphasize areas that require the most coverage, such as entry points, high-traffic areas, and blind spots.
Best Practices for Placement:
- Ensure cameras are placed at a height that discourages tampering but provides a clear field of view.
- Avoid placing cameras in locations exposed to harsh weather unless they are weatherproof.
- Position cameras to avoid glare from direct sunlight or artificial lighting.
Step 3: Mounting the Cameras
Once the locations are determined, mount the cameras securely. Use appropriate anchors and mounts to ensure the cameras are stable and their position will not shift over time.
Mounting Tips:
- Use a level to ensure the camera is aligned correctly.
- Tighten all screws firmly, but avoid overtightening to prevent damage.
- If drilling into masonry or concrete, utilize masonry anchors for stability.
Step 4: Running the Cables
Run the necessary cables from the cameras to the recording or monitoring equipment. Hide cables when possible to protect them from environmental damage and reduce the risk of tampering.
Cabling Best Practices:
- Use conduit to encase cables for added protection.
- Label cables at both ends to simplify future maintenance.
- Plan the cable routes to minimize the length and avoid interference from other electrical devices.
Step 5: Connecting the System
Connect the cables to the cameras first, then to the recording device or network. Ensure all connections are secure and appropriately insulated.
Connection Considerations:
- Double-check connections for power, video feed, and any additional sensors.
- Use cable management solutions like zip ties to organize and secure cables.
- Test each camera individually before finalizing the connection to confirm functionality.
Step 6: Powering Up and Initial Testing
Once all cameras and cables are connected, power up the system. Verify that each camera is receiving power and transmitting a clear signal to the recording or monitoring device.
Testing Tips:
- Check camera feeds for image clarity and coverage.
- Test the system under different lighting conditions to ensure performance remains consistent.
- Confirm that all angles and areas intended for monitoring are properly covered.
Final Adjustments
After the initial testing, make any necessary adjustments to the camera angles and positions to optimize coverage. Perform a final check to ensure that all components are operational and that the system meets the expected requirements.
By following these steps and adhering to best practices, you can ensure a successful security camera installation that provides reliable and effective surveillance.
System Configuration and Integration
After the physical installation of security cameras is completed, the next crucial step is system configuration and integration. Proper configuration ensures that the security system operates efficiently and meets the specific security requirements of the premises.
IP Address Assignment
Each security camera must be assigned a unique IP address to communicate effectively within the network. This can be done manually by assigning static IP addresses or automatically through Dynamic Host Configuration Protocol (DHCP).
- Static IP: Recommended for consistent network communication and easier troubleshooting.
- DHCP: Useful in large networks where manual assignment is impractical, although it may lead to IP conflicts over time.
Network Configuration
Security cameras need to be configured to communicate with the Network Video Recorder (NVR) or Digital Video Recorder (DVR). This involves:
- Ensuring that the cameras are on the same subnet as the recording device.
- Configuring ports for communication and video transfer.
- Setting up Quality of Service (QoS) to prioritize video data over other network traffic.
Camera Settings
Specific camera settings should be adjusted to achieve optimal performance, including:
- Resolution: Higher resolution improves image quality but requires more bandwidth and storage.
- Frame Rate: A higher frame rate provides smoother video but also increases data usage.
- Compression: Techniques like H.264 or H.265 can be used to reduce file sizes while maintaining video quality.
Integration with Existing Systems
Security cameras can be integrated with various other systems for enhanced functionality:
- Access Control Systems: Synchronizing video feeds with access logs for comprehensive security monitoring.
- Alarm Systems: Linking cameras to alarm systems to capture footage during security breaches.
- Smart Building Systems: Enabling features like motion detection to trigger specific automated responses.
Remote Access and Monitoring
Configuring remote access allows for real-time video monitoring from any location. This entails:
- Setting up secure remote access protocols, such as Virtual Private Networks (VPNs).
- Configuring mobile applications to receive live video feeds and alerts.
- Ensuring compliance with cybersecurity measures to prevent unauthorized access.
Testing and Validation
Before considering the installation complete, it is essential to test and validate the system:
- Perform end-to-end tests to ensure all cameras are working correctly and recording efficiently.
- Verify network stability to handle the data traffic generated by the security system.
- Conduct functionality checks for all integrated systems and remote access features.
Documentation and Training
Finally, ensure that all system configurations and procedures are thoroughly documented. Providing adequate training for personnel responsible for monitoring and maintaining the system is essential. This reduces the likelihood of errors and enhances the overall
effectiveness of the security system.
Proper configuration and integration are essential steps that ensure the security camera system performs optimally, providing reliable monitoring and recording capabilities to enhance security measures.
Maintenance and Troubleshooting
Regular maintenance is essential for ensuring the optimal performance and longevity of security camera systems. A routine maintenance protocol helps to prevent potential issues that could compromise the security efficacy of the system. Here are key aspects to consider:
1. Regular Cleaning:
- Lenses: Clean the lenses periodically to prevent dirt, dust, and other debris from obstructing the camera’s view. Use a microfiber cloth and an appropriate lens cleaning solution.
- Housing: Ensure the camera housing, especially for outdoor cameras, is free from dust, grime, and watermarks. This is vital for maintaining the clarity of captured images.
2. Inspecting Connections and Cabling:
- Cable Integrity: Inspect all cables for signs of wear and tear, such as fraying or exposed wires. Replace any damaged cables promptly to maintain connectivity and signal quality.
- Connection Points: Ensure all connectors are secure and free of corrosion, particularly in outdoor setups where environmental conditions can affect metal parts.
3. System Updates and Software:
- Firmware: Regularly check for firmware updates from the camera manufacturer and apply them to ensure the system benefits from the latest security enhancements and features.
- Software: Update the system’s management software, including video management systems (VMS) and any integration software, to ensure compatibility and improved functionality.
4. Checking Camera Angles and Coverage:
- Adjustment: Periodically review and adjust camera angles to ensure they provide adequate coverage as per the original security plan. This includes adjusting for any shifts due to weather conditions or other physical impacts.
- Blind Spots: Identify and rectify any new blind spots that may emerge due to environmental changes or alterations in the monitored area.
5. Assessing System Performance:
- Recording Quality: Regularly review recorded footage to ensure the video quality meets the required standards. Look for any signs of degradation in image clarity or frame rate.
- Alerts and Notifications: Test the system’s notification and alert mechanisms to confirm they are functioning correctly. Ensure that sensors are responsive, and the integration with mobile devices or other alerting systems remains intact.
Troubleshooting Common Issues:
Even with regular maintenance, issues may arise. Here are some common problems and their respective solutions:
- No Video Signal: Check the power supply to the camera, ensuring it is receiving power. Verify network connections and replace damaged cables if necessary.
- Poor Image Quality: Clean the camera lens and check the lens focus. Adjust lighting in the area to ensure optimal visibility. Update the camera’s firmware if the issue persists.
- Intermittent Connectivity: Inspect for network issues by testing with a different network cable or port. Confirm that network traffic is not limiting the camera bandwidth.
- Motion Detection Failure: Adjust the sensitivity settings of the motion detection feature. Ensure the camera’s view is clear of obstructions that could interfere with detection.
By adhering to a diligent maintenance schedule and addressing issues promptly, the integrity and reliability of security camera systems can be significantly enhanced, providing ongoing surveillance security and peace of mind.